DNA sequences
Who can use this feature?
👤 By default, all Admins and Editors (but not Viewers).
🏢 Available on all plans.
Colabra enables users to preview primer sequences right within your experimental notes, edit them, and manage all properties, primers, protein translations, cut sites, and ORFs.
Simply drag the sequence file into the editor, or type /DNA and press Enter.
This will insert a preview image, while still allowing you to access the original file (hover the image, click the three-dot menu and choose Download).
Click the Edit sequence button to open a full-fledged vector/plasmid editor.

Supported formats
Colabra's plasmid editor is fully compatible with all common file formats, including those used by tools such as SnapGene and Benchling:
FASTA format (.seq, .fa, .fas, .fasta)
GENBANK format (.gb, .gbk, .genbank, .ape)
SNAPGENE format (.dna)
JBEI format SBOL 1.0 and SBOL 2.0 formats
Video overview
Navigating sequences:
After you have created a sequence data entry point → you can directly copy/paste a sequence or enter a custom sequence manually in the Sequence Map entry.
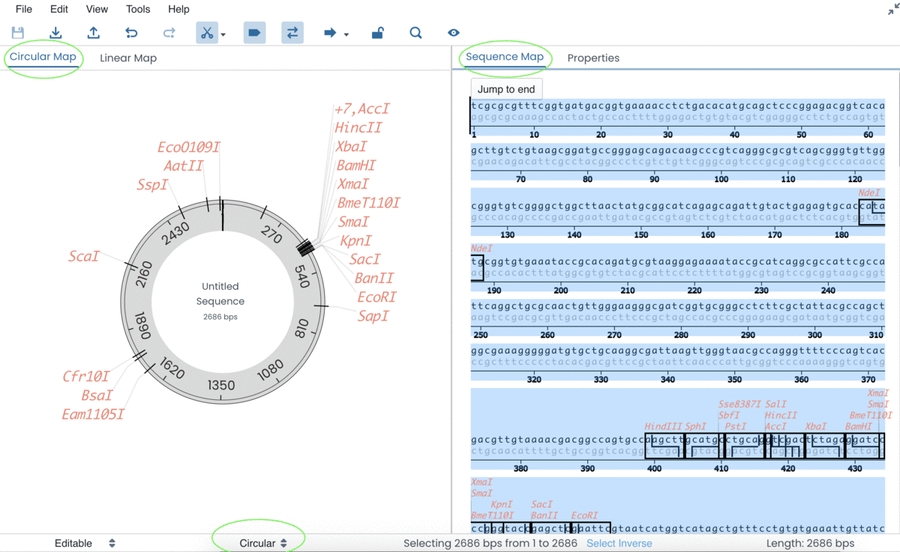
When the sequence has been entered → you will be able to view the Circular/Linear Map on the left-hand side of the screen and detailed features of the sequence on the right-hand side of the screen.
At the bottom of the page → you will be able to change your sequence type (circular or linear), which will be instantly mirrored on your genetic map.
When the sequence is entered → DNA cut sites, promoter regions, open reading frames and primer regions will automatically be outlined.
Colabra team tip: You can change the view and the nature of the sequence to linear or circular. Please make sure, both of these are the set the same to avoid confusion by viewing a circular sequence on a linear map and vice-versa. In the GIF below, you can find examples of circular (pUC18 plasmid) and linear (ACTN3 exon 1) DNA sequences.
Toolbar menu:
Top (left to right)
File → rename, save, read-only, import, export, print, properties
Edit → create, cut, copy, paste, undo, redo, find, go to, select, change case, complement selection, complement entire sequence, reverse selection, reverse entire sequence, rotate to caret position
View → show all, hide all, features, translations, primers, parts, cut sites, ORFs, sequence case, full sequence translation, axis, axis numbers, reverse sequence, DNA colors, feature labels, part labels, cut site labels, external labels, label line, label line intensity
Tools → add additional enzymes, simulate digestion, remove duplicates
Help → searches through the toolbar menu
Bottom (left to right)
Save → saves a sequence
Export → downloads a sequence to your device
Import → imports a sequence to the Sequence editor
Undo → reverses a change
Redo → reapplies a change that had previously been deleted
Hide cut sites → enables you to filter through which cut sites you want to display
Hide features → enables you to show/hide features
Hide primers → enables you to show/hide primers
Open reading frame → shows ORF Translations and shows GTG and CTG as start Codons
Switch to read only → prevents any editing
Find → enables you to search through the sequence
Visibility → enables you to select what you want to see
Editing a Sequence:
Add a plasmid editor widget and you can start to load a sequence and see the features in real time. All the features will be loaded automatically and the sequence can be changed on the right side of the panel.
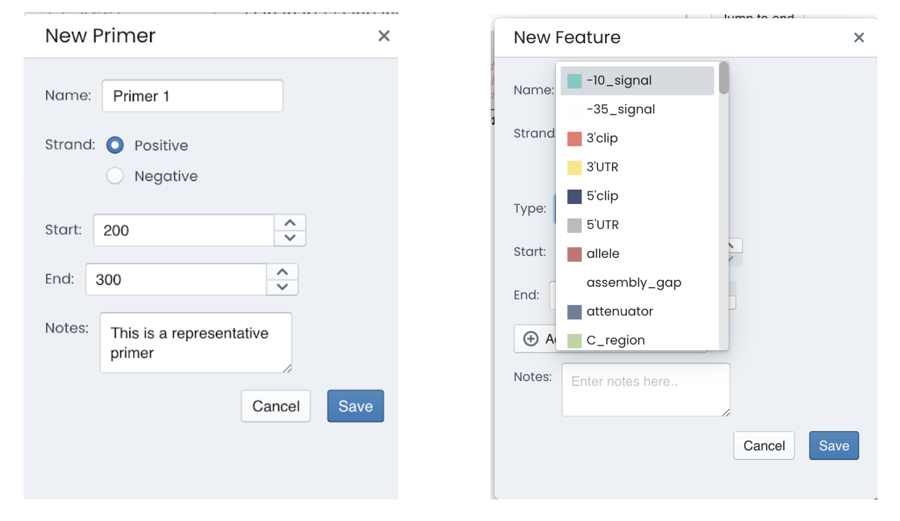
Accessing the “edit” tab allows you to create new elements for your sequence. Here you can add and sort more than 80 types of features and parts such as 5’/3’ untranslated regions, genes, attenuator sequences, conserved regions or transposons. They can be named, they will appear on both your genetic map and the detailed sequence overview.
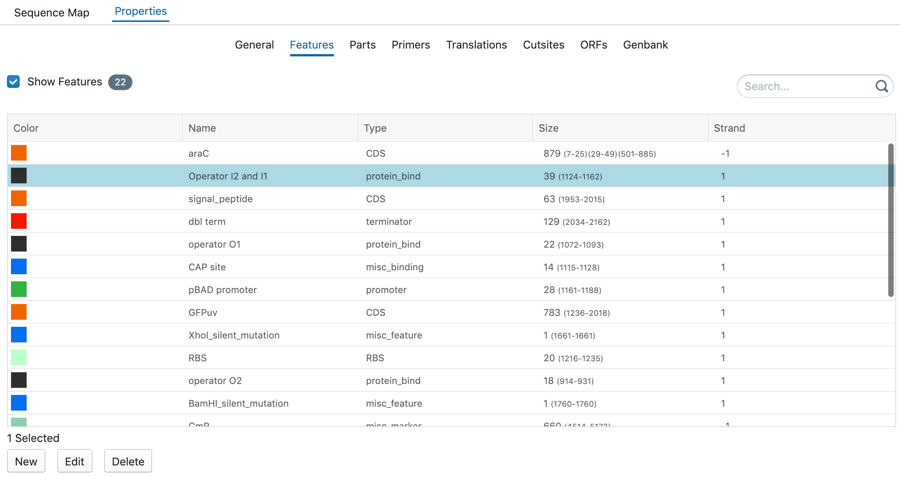
All features are summarized in the tab of Features. You have the option to change the color, name, type, strand. Select a sequence and right click to change, delete or create a feature. To reach this:
Click on 'Properties' on the right-hand side panel
Click on 'Features'
Select a feature
Colabra team tip: Clicking on 'New' will create a new feature, 'Edit' will edit the current selected feature and 'Delete' will remove it.
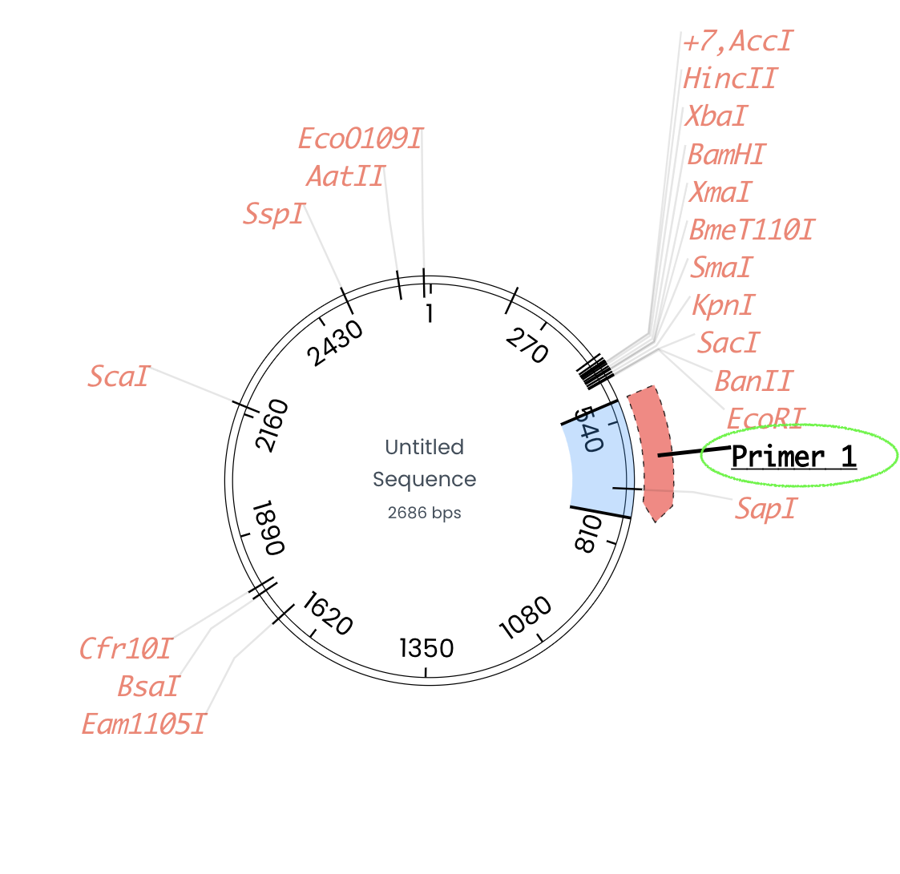
The edit tab allows you to create a new primer by simply introducing the start and end region for the primer.
The primer will be present on your genetic map as an arrow.
Last updated


